Netiks 360Bank: Elevate Your Banking Experience
Unlock the Power of Unified Customer Insights
In today's fast-paced banking environment, delivering personalized and efficient service is crucial. Netiks 360Bank, powered by Microsoft Dynamics 365 CRM and advanced AI-driven CRM solutions, enables financial institutions to unify customer data across all channels. Our omnichannel banking software integrates seamlessly with digital transformation tools, sales automation, and customer service software, providing a comprehensive view of each customer for enhanced personalized experiences and secure interactions.
Book a Demo
Key Features of Netiks 360Bank
Netiks 360Bank, powered by Microsoft Dynamics 365 CRM, consolidates customer data from multiple sources into a single platform.
Enhanced Sales Strategies
- Boost upselling and cross-selling with categorized product suggestions.
- Customize queries for personalized recommendations.
Real-time Alerts
- Receive instant notifications based on configurable triggers.
- Stay proactive with alerts tailored to varying levels of importance.
Insightful Business Metrics
- Quickly assess customer status with color-coded indicators.
- Identify critical issues or opportunities at a glance.
Empowering Actions
- Equip your team with configurable tools for tasks like previewing ID cards, customer signatures, and initiating requests.
- Streamline operations and improve responsiveness.
Comprehensive Customer Insights
- Track customer activities, cases, and opportunities through a customizable timeline.
- Tailor views to meet specific business needs.
Transform Customer Interactions with Netiks 360Bank
Transform how you interact with customers using Netiks 360Bank
- Simplify customer record management within your core system.
- Gain a comprehensive view of customer data and interactions for better decision-making.
Enhance scalability and efficiency
- Gain insights into account data, profitability, and trends to ensure financial health.
- Automate tasks to prioritize customer relationships.
Drive effective marketing
- Utilize customer data for targeted marketing campaigns.
- Build loyalty through personalized outreach across the customer lifecycle.
Our Comprehensive Offerings
CRM Solutions
- Enhance customer interactions with our AI-powered CRM and omnichannel banking software.
Marketing Automation
- Tailor your approach with Microsoft Dynamics 365 CRM and advanced digital solutions.
Analytics
- Gain insights from customer data for smarter business decisions and personalized customer experiences.
Consultation
- Leverage our expertise in CRM implementation and customer relationship management tools for business growth.
Book a Demo
Licensing
Our products need a valid license in order to work as expected.
To obtain a license for the Netiks 360Bank Product, you need to do the following:
1. Go to Settings → Solutions
2. Open the Netiks 360Bank Solution
3. Make sure you’re in the Configuration page
4. Fill in the required info and click “Activate Trial”.
5. A Trial License will be activated for 1 month.
6. If you want to buy a license, click “Get License”. Someone from Netiks will be in contact shortly.
Since the Netiks 360Bank product contains multiple components, not all of them fall under the same license. In order to license the whole product, 3 licenses need to be generated:
- Netiks 360 (Solution)
- Smart Notifications (Solution)
- Sales Recommendations (Solution)
If a license is not activated, components will not work as expected.
Installation
1. Open your web browser and go to Microsoft AppSource
2. Search for Netiks 360Bank app
3. Locate the app and click install
4. You might be asked to login to your dynamics online instance, in case you are not
5. Follow the installation wizard until you reach the successful message
6. After installation, go to your Dynamics 365 instance ( with a System Admin user)
7. Go to Settings
8. Choose Product Types under Recommendations
9. Click  in the command bar
10. Go to Settings → Security → Users
11. Select any user that will be using the Netiks360 Product
12. Give the user the following roles:
o Netiks – 360Bank – User
o Netiks – Customer Touchpoints – User
o Netiks – KBI Indicators – User
o Netiks – Smart Notifications – User
13. Go to settings → 360Bank → Button Configurations → Publish
14. Go to the Netiks 360Bank App
15. Go to the list of contacts
16. Select any contact (or create a new one if none exist)
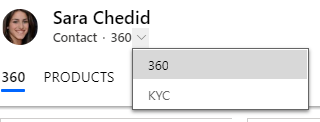
17. In the form selector, choose the 360 form

18. You should see the Netiks 360 Form.
Sample Configuration
In order to simplify the configuration process, we have included sample configuration data for each component.
o Sample products: A list of products that end with (sample). These can be removed once you configure your own.
o Recommendations: We have created a sample recommendation configuration with a query (contact’s gender does not contain data). As long as this condition is true, the recommendation will appear.
o Configuration Location: Settings → Recommendations
o We have set a sample alert to display when the contact’s gender is missing.
o Configuration Location: Settings → Notifications
- Key Business Indicators :
o We have created 4 KBIs:
- Case Indicator
- Delinquency
- Satisfaction
- Engagement
o Configuration Location: Settings → KBI Holders
o We have created 4 Button configurations to demonstrate the 4 types of actions:
- Google: Opens a URL with the contact’s name as parameter
- New Task: Creates a new task related to the current contact
- Products: Opens an out-of-the-box report regarding the current contact
- Signature: Download or Previews an image on the contact (for this to work, you need to attach an image containing the word ‘signature’ in its name.)
o Configuration Location: Settings → Button Configurations (Make sure to hit  after any changes done in the button configurations)
o Our default touchpoints are the Activities, Cases and Opportunities.
o These are configurable as well based on need, you can remove or add touchpoint entities.
o Configuration Location: Settings → Touchpoint Categories
Book a Demo